Spend time in the deer woods, employ a few tools, add up all the intel – and you’ll be well on your way to locating bigger deer, and putting venison in your freezer next fall. With a little luck, you might even score some shed antlers along the way.
We all know hunters who are more successful than others? Not only do they put meat on the table year after year, but many are repeatedly tagging big mature bucks. No doubt, – good or bad – luck has some bearing on the outcome of every hunt, but more of than not, these consistent performers have one thing in common. They all get an early start on scouting. They’re the ones who invest the effort, hunt hard, and secure rights to hunt quality real estate with the best food sources and the highest numbers of does. By accumulation, this experiential learning makes them better, more successful deer hunters. If you want to plan for success next fall, here’s how to do it.

monitor deer movement in early November
I’m a big fan of doing my homework and tipping the odds in my favor, so early scouting is a priority. The best way to do this – invest as much time and energy as possible before game time. When the season opens, all that’s left is putting in the hours on foot or on stand. Gathering information, and then applying those details correctly, allows me to eliminate the initial unknowns and capitalize on putting the pieces of the puzzle together. By scouting my deer hunting areas year-round, planning is all about learning where the deer – especially the big ones – sleep, travel, and feed with particular interest in their patterns during the open hunting seasons. In areas where hunting seasons close the end of November, these efforts begin as early as December.
Winter Shed Hunting
For a growing number of us, as soon as one season closes, preparation for the next one begins. As rut cycles fade away, deer transition into their cold-weather bedding-feeding routines. Especially in northern states and provinces, December is when the earliest of antlers shed. Some whitetails will begin to drop their headgear as early as Christmas, with most shedding them throughout January and February. Some will even hold on as long as March. Just as the mule deer rut generally cycles two weeks later than that of their whitetail cousins, keep in mind that most mulies shed theirs in March and April.

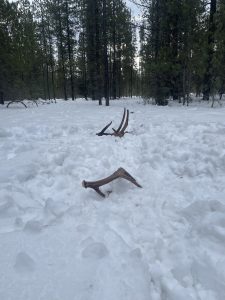
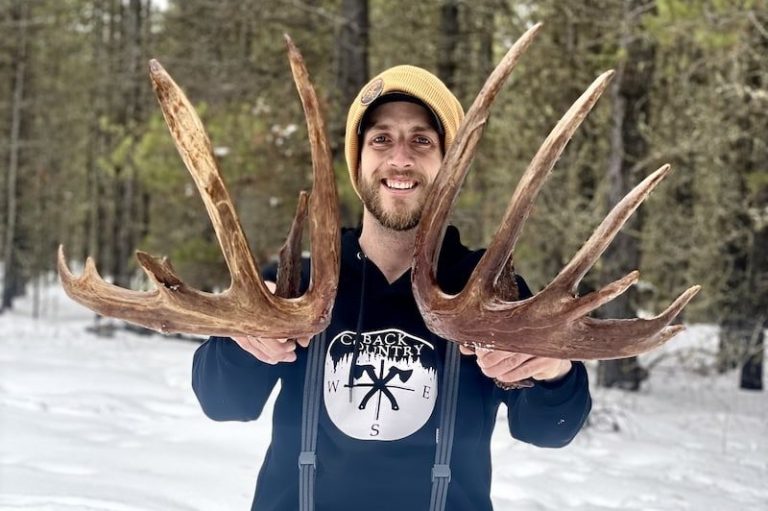
I like to pick up shed antlers before they’ve become weathered or chewed by rodents. With deer dropping their headgear in winter and early spring, snow can be a blessing. Chocolate brown antlers can look a lot like grass, shrubs or even tree branches. The white stuff offers a good backdrop and makes them easier to see. That said, when antlers drop, can also provide valuable information about the health of the herd. For instance, on years when the winter weather is mild, I’ve noticed that a lot of the bucks will hold their antlers until the end of February. This is a telltale sign that our winter wasn’t all that stressful. In contrast, during harsh winters I’ve seen the majority shedding their antlers up to a month earlier.
If you’ve never looked for sheds before, or if it’s been difficult to find antlers in the past, consider this. Focus on where the deer are wintering. Feed sources, bedding areas, heavily used trails and fence crossings are the key to success when looking for dropped antlers. Northern deer often face deep snow conditions making it tough for them to forage for food. Deer invariably find the best available food and herd up during the tough winter months. This strategy becomes most straightforward when small blocks of forest border agricultural lands. Although less common these days – grain piles, open bins, unharvested food plots (where legal), and crops such as corn, soybean, barley, alfalfa and peas are excellent places to target. With the deep freeze temperatures, deer will minimize energy expended by bedding as close to their food source as possible. Poke around in the nearest cover, and you’re sure to find multiple beds being used day after day. Trails leading to and from bedding/feeding areas will look like hard-packed highways. These trails themselves can be good shed antler producers. Savvy shed hunters will routinely check these places throughout the season. Lastly, another of my favorites is heavily-used fence crossings. The jarring motion on impact, when a buck jumps the fence, can be enough to sever an already loosened antler, depositing it on the ground for easy pick up. Keep in mind however, too much human pressure can add undue stress to animals already battling harsh winter survival conditions. Find a balance between picking up fresh sheds and disturbing the bedding area too often at this time of the year. And of course, recognize that there are more and more strict regulations being established around shed hunting in different states and specific jurisdictions.
When you walk the trails, scan every inch of ground you can. Remember, even the largest of antlers are not that big and they’re often covered by snow. Sometimes only an inch or two of the tines may be protruding. Learning to recognize the color and shape of sheds becomes a skill gleaned only through practice. Be diligent – just because you didn’t find anything on the first outing, doesn’t mean you won’t the next.
I like to establish a regular routine and keep a record. Every time I walk a property, I take the same route. By doing this I’m nearly assured of picking up whatever freshly deposited sheds are in the area. Along with this I like to keep a record of where, when and what was found. This can provide valuable information about the genetic and age-class profile of resident bucks – valuable information when I compare records from year to year, and going into the summer and fall.
With some exceptions, deer seldom winter exactly where they live during the summer months and especially during the fall rut, so whatever information you collect from winter feeding patterns and shed hunting needs to be kept in perspective.
I’ve spent many cold days hiking game trails scouring the woods for a specific buck’s antlers. Picking them up year after year has taught me a lot about the behavior and patterns of those deer. But as soon as the snow goes the end of March and in early April, those deer migrate back to the cover of their home woodlots.
Spring Scouting

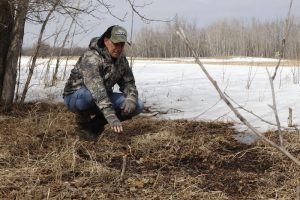
As soon as the snow vanishes – usually by early April – take time to walk the entire area you plan to hunt. Cover every game trail possible and take special note of ridge trails along waterways and other natural features that funnel movement. The latter two weeks of the month offer a valuable opportunity to see what’s really going on in the woods. Google Earth satellite imagery can be a great asset in giving you a bird’s eye view, but nothing beats putting boots on the ground. In early spring, before things green up, not only will you see the scrapes and rubs made back in November, but because everything is brown and down, you can really get a sense of what the animals are doing. Take note of those scrape lines and rubs. Primary scrapes are often made several years in a row by specific bucks. Remember that when those deer die, those scrapes often disappear unless they have been taken over by other bucks – and this is common as well. Sometimes scrapes will be adopted by multiple generations of deer. Locate these rare gems and you’ve got a head start on a hot spot for next fall. Always take note of these active annual scrapes and think about how they fit into the big picture.
Rubs are less definitive but certainly worth noting. Finding a big one is great – it tells you there was a big deer there at some point in time, but little more. If, on the other hand, you locate several large rubs in the vicinity, or if it appears as though that buck has been working the same tree for several years, then you’ve discovered a valuable piece of information – a definite reward for your pre-season spring scouting efforts. Be sure to record that information for future reference. I once found a rub on a large spruce tree along a heavily used trail. Many deer had used both the trail and the rub for years. Structurally significant, topography dictated where the deer would move. It didn’t take long to understand the importance of that rub and I quickly set up a tree stand to capitalize.
With the arrival of warm weather and spring rains, it only takes a few weeks before grasses begin to sprout and leaves begin to bud. In a short time, heavy cover limits visibility. When this occurs, deer begin to enjoy undetected movement under the cover of the forest. By mid-May, deer are already less visible and shifting into their spring patterns. Pregnant does will be dropping their fawns in June and when this happens, it can seem like the deer have been beamed off the planet. Bucks are starting to grow new antlers and with the newfound cover, they too become much less visible during daylight hours.
Spring is also a great time to talk with landowners about the crops they are planting. Remember, deer key in on the best food sources year-round. When I speak with producers in the off season, I ask two questions: if they know of any big deer in the area and, what they are planting? In my areas, crops like peas and alfalfa are rich in protein and therefore highly attractive to deer. Remember, just because you discovered a bunch of deer coming into a field the season before, doesn’t necessarily mean they’ll repeat that same behavior the next year. Outside of the doe estrous, deer movement is dictated primarily by food and security. If a farmer plants canola for instance, that field and surrounding woodlot may be relatively void of deer if there’s a pea crop a half-mile away. I’ve seen entire family groups of deer vacate a woodlot, shifting by as much as a mile, to take up residence closer to the prime food.
Summer is for Trail Cameras
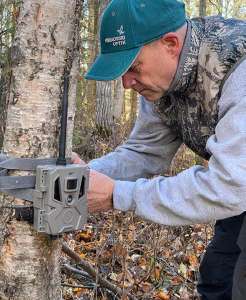
It can be advantageous to run trail cameras all year, but if you’re budgeting your battery budget, and time afield, placing them by the end of June is a really good idea. This allows you to begin monitoring less visible summer movement patterns while tracking antler growth. As crops begin to grow, deer enjoy protected movement in the woods and even as they venture out into the often chest high crops in July and August. Today’s cameras come with many different functions. The more advanced have wifi connections that facilitate immediate delivery of images captured in real time. Today, most cameras allow you to choose if you want to capture still photos or video. They’re amazing tools providing valuable off-season information.
When it comes to sorting out big deer though, remember that seldom do mature bucks repeat their steps. When we finally do capture trail cam photos or video of a giant doing the same thing more than a couple times in a row, take note and continue following his behavior.
As far as trail camera placement goes, a few simple guidelines will increase your odds of getting clear quality images. Always choose your camera locations strategically by playing the odds. Heavily used trails may be a top priority, but trail intersections increase your chances of documenting movement. Consider wearing latex gloves or spray down your camera to minimize human scent on the camera itself. Make certain that both the lens and the sensor are clean and dry. Lining up the camera at the right height and angle should be your priority. This will depend on the lay of the land and the available trees. Whenever possible I try to mount my cameras to trees that are at least six-inches in diameter. Fence posts can work when circumstances allow. I generally prefer to angle them slightly toward, but mostly perpendicular to, the direction of anticipated travel and usually no more than eight-feet away from the trails I’m monitoring. Aiming it directly at a trail intersection has proven to be very effective over the years. Carefully removing tall grasses that can sway in the wind inadvertently triggering the shutter, can save you hours of deleting unwanted images.
During the spring and summer months, fight the urge to check your cameras too frequently. It’s better to let the deer move freely without interruption, checking maybe once every few weeks. Other than that, make sure your cameras are armed with fresh batteries and plenty of room on your SD cards. I tend to favor cards with at least 16 GB of space. Cards with at 32 GB are better. Nothing is worse than returning to check a camera and finding the batteries are dead or that the card filled up the first day.
Having scouted winter, spring, and summer, you’ll have loads of information. You will have a good understanding of the age and size of the deer in the area; where they traditionally travel, feed, and sleep: and where they lay down rut sign. Of particular value, you’ll have good records of the age classes, and antler growth in your area. After that, it’s simply a matter of making a plan. Set your stands or blinds, and prepare for the opener. Sounds simple right. To some extent it is, but there’s no getting around the work involved with scouting year-round.
Per our affiliate disclosure, we may earn revenue from the products available on this page. To learn more about how we test gear, click here.


