August and September are great months to start using your trail cameras. With antler growth reaching its potential and velvet shedding, this is prime time to capture images of the deer, moose, elk, and whatever other game you might target for the season ahead. If you’re a trail camera junky, then some of this may be redundant. Still, with a growing number of us acquiring today’s high-tech trail monitoring units, reviewing a few helpful tips for preparing, setting, and maintaining them is timely.
Trail cameras have completely revolutionized the way many of us hunt. Visit any online hunting message board, and trail cam debates, how-to advice, and consumer information are readily available. Everyone has an opinion, and many aren’t shy about sharing their views—some helpful … others less so.
1. Scheduling.
When Should You Set Up Trail Cameras?
Straight up, placing your cameras, is really a personal thing. Although they can certainly be used year-round, for my own purposes, I would like to put my own cameras in late July. I used to run them all year, but as soon as bucks drop their antlers until they are at least half regrown, I find the images and movement can be hit-and-miss, and when I do capture movement, it really doesn’t provide much more than letting me know what’s made it through the winter and what the buck-to-doe ratio is. Images and video clips don’t really begin to get interesting until July. As we move into August, antlers start to reach their potential, and we begin to get an accurate picture, both figuratively and literally, of the caliber of the game we’re monitoring.
Assuming you’ve already purchased your camera of choice, now comes the fun part. Like selecting stand sites, finding a high-odds location for a trail camera requires some legwork. From choosing a site to preparing the site, mounting the camera, confirming the settings, and checking it – all are essential steps in using trail cams.
2. Preparing Your Camera for the Field
Before setting out with cameras in hand, we need to take several steps to prepare them. First things first: Be sure to read the owner’s manual so that you fully understand how your camera works. Manufacturers sometimes have proprietary steps peculiar to the operation of their products. Spypoint, for example, is well-known for its requisite firmware upgrades. More on this in a minute.
Know that preparing most cameras is easy but necessary. Always load fresh batteries in your unit before placing it in the woods. With many cameras, we have the option to utilize a solar panel to power them. This is a great option that eliminates the need to exchange batteries regularly. Some of today’s cams come with a built-in solar panel, but most still have accessory solar panels available for purchase.
Most of today’s digital cameras require a removable memory card. If your camera does not include a card, and most don’t, be sure to insert a formatted memory card. Know that cards should always be reformatted before they are installed in any new camera. The SD card size should be determined by the length of time you want to leave the trail cam unattended. The longer the time between checking it, the larger the card you may want to use. Today’s cameras vary in the size of cards they can facilitate. On average, though, I like to use at least a 16 GB card and 32 GB if cameras can handle them.
3. Selecting Camera Locations
Recently, we placed cams with a friend, visited favorite properties, and before heading out, took a close look at air photos. OnX is a great resource for this. Google Earth is another accessible tool as well. By taking a look from above, we quickly identified likely spots—places that we would further investigate on foot to evaluate trail use. The key with early-season camera locations is to recognize that spring and summer movement is very different than movement in the early Fall and during the rut.

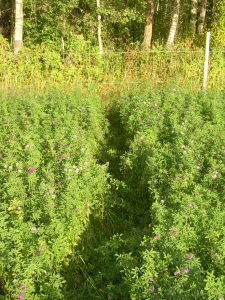
In the early season, particularly in preparation for the first couple weeks of bow season, those field edges or transition zones between bedding and feeding, just inside field edges can be great places to check for movement. In my experience, even on the best properties with the best available food sources, deer, moose and elk movement can be evident with lots of different trails being obvious. In agricultural areas, your first step should be to walk the field edge and probe into each and every trail you deem worthy of further investigation. If your area holds a good deer population, you’ll readily identify traditional trails. As a rule, on every quarter section of land, there is usually one or even two trails, or spots, that are much more heavily used than all the rest. The key to selecting a good trail camera site is consistent with picking a good stand site – locate the trail with the highest density of current movement.
On more than one occasion, I’ve invested hours deciding on the best sites for trail cameras. Before making your final decisions, walk deer trails for several hundred yards. By thoroughly investigating those trails, you’ll get a feel for what the deer or other game animals are doing.
4. Field Edge, Bays, and Coves
Remember that ungulates like and use concealment to their advantage. Field corners, bays, or coves, that offer a bit more concealment are almost always used to enter and exit feeding fields. Some of my best early season trail camera locations have been on locations where main trail(s) connect with these structural hotspots.
5. Fence Crossings
Often, animals will cross fences where the barbed wire is either broken or sagging. Preferring the path of least resistance, if they don’t have to jump, they’ll take the easiest route. Walk fence lines and you’ll often pinpoint these key fence crossings. I like these spots for early trail cameras, mostly because animals will usually stop for a short time, allowing you to capture several images or videos, before they cross the fence.
6. Mineral Licks are Money

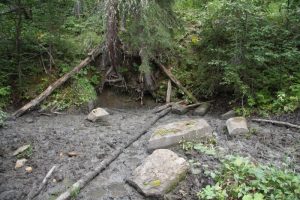
Aside from entrance and exit trails connecting big timber to feeding fields, hands down, one of the best natural sites for trail cameras in the heat of the summer and the first few weeks of hunting season, is a mineral lick. Licks are particularly active during hot dry spells. Strategically placing cameras on heavily used trails to and from licks will invariably capture lots of images at this time of year.
7. Where to Mount Your Camera
As a rule, I usually look for a tree or fence post, that’s at least eight inches in diameter. Remember, heavy winds come and go. The bigger the tree, the more stable your camera will be. Small-diameter trees simply move too much in windy conditions. With built-in sensors, any movement will trigger the shutter. Rare as it often is, the right fence post can be rock solid but then tend to have a narrower diameter. Sometimes securing the camera to a fence post can be more difficult.

Regardless of what you mount your camera to, consider both its size and location. Even though most cameras are designed to sense motion and trigger the shutter out to at least 45 feet, in my experience, the best images are captured by selecting a tree or post that is eight-to-15 feet from the trail, or where I anticipate the animal to move within the camera’s field of view.
8. How to Mount the Camera
How you mount your camera, especially for early season images will determine how many dud captures you get of grass and leaves moving in the wind. Furthermore, it will determine the overall quality of the game pictures you capture.
How you mount the camera will dictate the type of images you end up with. Anymore, I always use a portable mount that allows me to pivot and change the angle of the camera to exactly what I want. Consider whether you want broadside, head-on, or behind shots and mount the camera accordingly.
In my experience, the best images are usually when animals stand still or pause within the camera’s field of view. Where regulations allow, bait can cause animals to stand with limited motion. Where we rely on natural movement, I find it most beneficial to mount the camera in such a way that it captures the subject as it moves toward or away from the camera at an angle. Broadside movement can be captured well, but depending on the camera’s sensor and the speed at which they are moving, images are often blurred or captured either prematurely or too late. In other words, the cam captures only the animal’s head or hind end. My favorite camera spots are larger trees about 10 feet from the convergence of two or three heavily used trails. By aiming the camera directly where the trails join, I repeatedly got great images.
As a rule, I generally mount cameras at my waist height on flat ground. Each location varies with the topography, but this is generally a good guideline. Sometimes, I’ll place them up high, angled down, or even low, aiming them high if I’m monitoring trails in a ravine or at a creek crossing with steep banks.
9. Clear Obstructions
Preparing your camera site is important. Choose the angle by kneeling down right beside the camera to see what the camera will see. Take the time to clear any tall grass, branches or other debris that might obstruct the camera’s field of view. Again, remember that in strong winds, these things move and can trigger the shutter, resulting in a memory card full of nothing but grass, leaves, and branches. This doesn’t mean obliterating the forest floor but creating a short open corridor that will allow for a clear view of game using the trail(s).
10 Check Your Settings
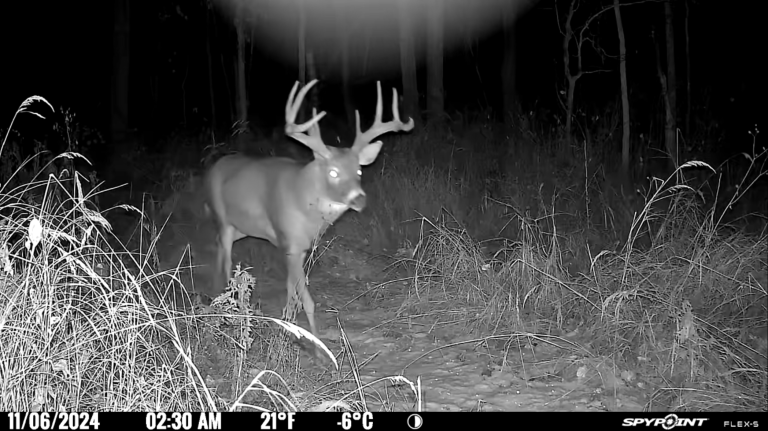
Setting and checking your settings will make or break the success of your trail monitoring efforts. Consider your end goal. Do you want still images or video? Low, medium, or high quality? How often do you want the shutter to go off? How much delay do you want between images? Do you want a date stamp – and most importantly, is the date and time set correctly … and so on.
Reaping the Rewards
Once your trail cameras are up and running, it’s a waiting game. If you have wifi cameras, you’ll be able to enjoy instant gratification each time an image is captured. If not, we’ll then you’ll have to decide how often to go in and check, or switch out the card. How long should you leave it? This really depends on circumstance. Consider your own impact on the area and the amount of traffic you think the trail is getting. For most early-season situations where you depend on early and late-day movement to and from bedding and feeding, you likely won’t want to check your camera more than once a week. Remember it’s important to minimize the amount of scent you leave on the trail. When you do check your camera, be sure to bring a spare memory card; this will allow you to simply slip out the active one and quickly replace it with a new one. Using a portable card reader, you can check it on the spot, or switch it out and vacate the area quickly.
Per our affiliate disclosure, we may earn revenue from the products available on this page. To learn more about how we test gear, click here.


